- You'll Need: several large seeds (we used pinto beans), 2 small sheets of glass or clear plastic, blotting paper or 2 - 3 paper towels, string or wire, container, water
- Lay one of the pieces of clear plastic down, fold the paper towels so they fit on the plastic.
- Soak the paper towels in water. Place the beans on the towels, then put the second piece of plastic over them.
- Fasten it all together with string or wire.
- Set it, standing up, in a container. Pour water in the container so the paper towels can continue drawing water throughout the duration of the experiment. You can use something to prop the plastic/beans up, or if your container is small enough (we used a styrofoam mushroom box) it can lean against a wall.
- Once the beans have sprouted and started putting out roots, turn the plastic/beans 180 degrees.
- In a day or two you can turn it again.
- The pictures below show the results of our experiment. This experiment took 12 days from start to final picture below.
Here the arrows show how the root started one direction, then after we turned it, the root started growing the opposite direction.
Here it is after turning it a second time. I traced one root in black and added the arrows to show the changes in direction. You can see how one of the stems changed direction, too.
Also on Monday we set up an experiment to show that plants need air and to see where they take air in.
- You'll Need: 3 identical plants (the same kind, anyway), vaseline
- On plant #1 put vaseline on the top of all the leaves
- On plant #2 put vaseline on the bottom of all the leaves
- Put no vaseline on plant #3
- As the leaves grow larger, or they grow more leaves, you'll have to add or re-apply vaseline
- Wait and see what happens.
Here are all three plants after 12 days.
Plant #1 is on the left. It is still looking good, but isn't growing as big as Plant #3, on the right. Plant #2, in the middle, has a very droopy leaf (see close up below). It was interesting that Plants #1 and #2 started growing more leaves faster than #3, I guess to compensate for the lack of air. Plant #3 was actually smaller than #1 and #2 when we started the experiment, but now it is bigger.
Tuesday
- We read
- A Tree is a Plant
- From Seed to Pumpkin
- We looked at what is Inside Seeds
- You'll Need: lima or pinto beans, paper towels, saucer, water, knife, magnifying glass
- Fold the paper towels to fit on the saucer.
- Put the beans between a fold of the towels.
- Soak the paper towels with water and let it sit for a day or two so the beans will sprout. Make sure the paper towels stay wet.
- Once the beans have sprouted, use a knife to take them apart.
- Observe what a sprouting bean/seed looks like.
God gave us this extra observation on Tuesday.
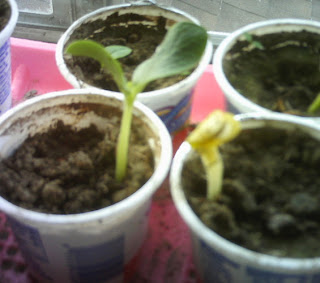
The pumpkin seedling on the right came up during the night and was yellow instead of green.
We looked at it every hour or so, and by noon it was green. This gave us the opportunity to talk about plants needing the sun to make chlorophyll -- which gives them their green color.
Wednesday we started an experiment about the Power of Plants.
- You'll Need: a plant that has sprouted (ours is a pinto bean), a piece of clear plastic (it needs to be clear so the sun can get to the plant), something to hold the plastic up (I cut up a shoebox)
- Set up the experiment so that the sprouted plant is under the plastic. Here is a picture of ours. (You can see paper clips. The book said to make chains of paper clips to keep track of how far the plant pushed the plastic. If it had pushed the plastic straight up that would have worked, but our experiment didn't work that way, so I removed the paper clips.)
Here you can see that the bean has pushed the plastic up.
Thursday we started the Follow that Light experiment.
- You'll Need: a sprouted plant (we used a pinto bean), a shoe box, cardboard, tape, knife or scissors
- Take the lid off the shoe box, and using tape place 2 pieces of cardboard in the box (see picture below).
- Cut a whole in the top of the box.
- Put the plant in the box and place the lid back on the shoe box so it is dark inside. We had to use a bit of tape to keep it in place. Remove the lid and water the plant as needed. It won't need to be watered as much as your other experiments because it is in the dark.
- At first the plant was just pushing the top piece of cardboard up, so we taped a couple quarters to it so the cardboard would stay down and the plant would have to go around it.
- The plant will grow around the cardboard and through the hole to get to the sunlight.
- Through a process called phototropism, plants grow in whichever direction is toward the sunlight.
Friday we made cards from the flower we had pressed a couple weeks before.


No comments:
Post a Comment